
When I did a recent search for photos of doll clothes with ribbons, here on my website, I discovered that I have uploaded 240 images in the website’s archives, showing the many ways you can apply ribbons to doll clothes. Holy smokes!
I’ve sifted through those archived photos and done a quick study of them. And here, in some semblance of order, are the top 10 ways I use ribbons when I’m making doll clothes…

10. I don’t make a lot of dolls’ shoes on this website, but when I do, I’ve found ribbons can be helpful for the shoes’ straps.
If you’d like to see my dolls’ shoes, and/or if you’d like to download some of those free patterns, please click here.

9. Again, this isn’t the most common way that I use ribbons for garments (which is why it’s coming in toward the end of the list, at number nine), but if you can find a ribbon that’s big enough, you can actually use it as a bodice.
In the image above, I’ve used a lace ribbon, folded over the top of a 2 inch wide bias tape, to form the bodice of Skippers babydoll-style nightgown. Click here to see that project and download the free, easy-to-sew pattern.

8. Instead of hemming a garment, sometimes I will fold the ribbon around the raw edge of the garment, the same way you might edge the garment with bias tape.
I did this at the neckline of my very popular candy corn Halloween party dress, the pattern for which fits many dolls in the 10 inch size range (and a couple of dolls in the 11 inch size range, like Francie):

7. You’ll notice that the dress above has a lovely layered embellishment along the edge of the skirt. For this, I’ve applied a 1/2 inch ribbon, and over the top, I’ve sewn on a rickrack trim.
I really like how that looks, and I’ve used similar layered embellishments with ribbon in other dresses and skirts as well. Ribbon is easy to layer as an embellishment.
Here’s another example:

The ribbon on Crissy’s 70’s style skirt came with lace already attached to it, but I applied the silver rickrack trim to add even more glitz and glam to the embellishment!
6. I don’t think anyone will be surprised that I sometimes add a ribbon to a dress as a belt. Here’s Skipper in my little elf costume, which uses ribbon as a belt, both on the dress, and on her elf hat.

Now the Santa-style belt with its buckle painted directly on the ribbon can be a little hard to find, but I did locate this 3/8 inch Santa belt ribbon on Etsy.
If you’re accessing this article long after it publishes though, there probably won’t be anymore left at that link. So you can always just add a mini buckle to your ribbon.
I think ribbons look nice without a buckle too. Check out this velvet one on my little Elsa doll’s dress:

5. When I first started sewing as a child, I didn’t know how to sew snaps, so I used a ribbon to tie the dress on my dolls. Today I still use this method from time to time.

A person can simply fold the ribbon in half and tack the center of the folded ribbon onto the front of a dress, once the bodice has been attached to the skirt, as shown below:

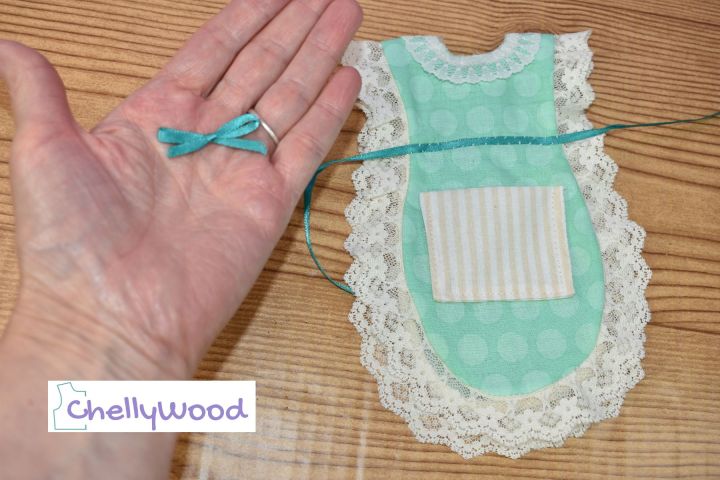
You can also wrap a ribbon around the front and have it tie in the back as a closure, just like how a person ties an apron in back.
When I was learning to sew, a lot of my doll clothes tied in back with a ribbon, like this apron, shown on a dress form pincushion:

4. My fourth method for using ribbons is also used quite commonly. Tie the ribbon in a bow and attach it to the neckline of the garment or the belt area of a garment, as a simple decoration.
We see that on my precious little bolero jacket, which I made for vintage Skipper. The jacket itself is closed in front with snaps, but the contrasting 1/8 inch Offray ribbon, tied in a bow atop the snaps really adds character to the bolero:

You can purchase pre-tied ribbons for your doll clothes, and JoAnn’s carries these as well as other craft stores, but I usually just tie mine into a bow and then tack it on the front of a garment with a few stitches.

3. After looking through the archived images of doll clothes I’ve designed for this website, I decided that the third most common use for ribbons is… as a purse’s strap.

There’s the traditional over-the-shoulder purse strap, which you see on Moana above, but I’ve also used ribbon for a loop-style purse strap on a doll’s clutch, like you see below.

And you can also use ribbon for a drawstring purse, like the one that goes with this little pioneer outfit on my Tinkerbell doll:

2. Coming in at number two is the basic ribbon trim, that runs along the edge of a dress’s skirt.

Ribbon trim can come with a decoration on it too, like you see on my Bratz doll below. When you use ribbon trim with a printed pattern, I recommend adding it to a solid color of fabric, or a fabric that has a very subtle print, like the mottled print of this Bratz doll’s skirt.

It’s also a good idea to make sure the pattern that’s printed on your ribbon trim somehow matches the color of the garment as well.
So for example, if you were attaching the blue grosgrain ribbon trim shown below to a garment, I would want the pink in the flowers to match the pink of the doll’s dress. I wouldn’t try to match the pale blue of the grosgrain ribbon’s background color to the garment; instead, I would choose one of the minor colors in the printed ribbon.

If I were adding the green grosgrain ribbon (shown at the far right) to a garment, I would try to match the red in the circles printed on it to the red of my doll’s garment. The red appears as the second most common color in this green ribbon, and that’s why I would choose to match it to a solid red garment.
And then finally, coming in at first place, as the NUMBER 1 USE OF RIBBONS FOR DOLL CLOTHES… (drumroll please)…
Straps!


If you would like to make a donation to this free doll clothes pattern website, please click here. There’s also a “Donate” button in the main menu.
For anyone who would like to expand their dolls’ wardrobes, you should really check out my “How to Alter Doll Clothes Patterns” course and my “Design Your Own Doll Pants Patterns from Scratch” classes on the Creative Spark online learning platform. Here’s my bio page on their website, where you can learn more.

For any class on Creative Spark, you don’t have to follow a schedule. Just sign up when you’re ready.
It’s a one-time fee for the course, and there’s no specific time limit to finish your course. You can just take your time and learn at the pace that suits you. So go check out my paid courses on Creative Spark, using this link.
As always, feel free to pin, like, or tweet about my free patterns and tutorials.
To read more about my free sewing patterns and tutorials, please visit the “Helpful Tips” page.
Disclaimer/Credit/Affiliate Marketing Link:
*Please note: when you click on links to various merchants on this site and make a purchase, this can result in this site earning a commission. Affiliate programs and affiliations include Amazon, JoAnn Fabric, Etsy, and the eBay Partner Network. As an Amazon affiliate, I earn from qualifying purchases. To learn more about how my website uses affiliate marketing, please visit the website’s Privacy Policy page.
Chelly Wood and the ChellyWood.com website are not affiliated with any of the doll or toy companies mentioned in this blog post, but Chelly enjoys designing her doll clothes to fit a variety of dolls. To learn more about the doll companies mentioned in today’s post, please visit the doll or toy company’s website.