
Yesterday I posted a whole article on the ten ways you can use ribbon trims. (Click that link to go back and read it.) So today I’m going to skip over ribbon as one of the five commonly used trims for embellishing doll clothes.
Ribbon is probably the most common form of trim that doll clothing sewing enthusiasts tend to use. It’s inexpensive, it comes in a variety of shapes, sizes, and colors, and it’s easy to attach to to a garment.

5. However we’ll start with the type of trim that’s fifth on my list of “commonly used trims”: embroidered trims (see image above).
Now, I have hand-embroidered my doll clothes, from time to time, and you can find my embroidery tutorials on this page. However embroidered trims are a whole different ball of wax.
As you can see in the image above, you can actually purchase pre-embroidered trims, without ever having to do any embroidery yourself.
Embroidered trims look like you’ve done a ton of work on your doll clothes, even though someone else (or perhaps some machine somewhere) did all the hard work of the embroidery.

My little “riding hood” for 8 inch dolls like the Breyer Riders uses this type of trim, as you can see in the image above (shown on a World of Love vintage doll), and it truly looks like I put a lot of work into my trim, when actually, I purchased this embroidered trim from a 25 cent bin at a yard sale!
Because embroidered trims are quite “busy,” with patterns and shapes, I do recommend using them on solid fabrics, like the white riding hood demonstrates. If you try to add an embroidered trim to a plaid or a floral fabric, the trim seems to get lost in the jumble of colors and shapes on the garment.
Now I don’t want to end my discussion of embroidered trims without mentioning that embroidered trims are a little different from printed ribbons, which you can see in the image below.

Printed ribbons are discussed in my ribbon article from yesterday, so if you want to learn more about them, I suggest you click on that link to go back and read more on this topic.
4. When I was in college, I used to sew and sell my doll clothes, to help me pay my tuition, and at that point in my sewing development, I didn’t like to sew a hem around the neck of a doll’s garment. So a lot of the doll clothes I made in college used bias tape around the neckline.

I’ve done a whole video on how to sew fold-over bias tape, with a focus on how you can use it to give a finished look to a doll’s neckline and sleeves, and you can click that link, to watch the video.
Both contrasting colors of bias tape and garment-matching colors of bias tape look pretty darned good on the neckline of a doll’s garment. Compare the images below, and you’ll see what I mean.
Here’s an example of a neckline with matching fold-over bias tape (white bias tape over white felt), where the bias tape is acting as a closure:

And here’s an example of contrasting bias tape used for a collar at the neckline and sleeve areas:

This is one of my favorite ways to use bias tape, but you can use it as an edge to your garment, as well as a belt. Have a look at my Barbie bathrobe, and you’ll see what I mean:

I’ve used bias tape for purse straps as well, just like you might use ribbon for a purse strap.

Eventually, I’d like to write an article on how to make your own bias tape, but as of yet, I don’t consider myself an expert at this. I’m learning though, with my fantastic mother-in-law to guide my lessons. And once I feel confident that I’ve got the skill down, I’ll definitely share what I’ve learned.
Meanwhile, Professor Pincushion on YouTube has a really nice video tutorial on how to make your own bias tape. You might go check that out.
3. Braided trim isn’t always easy to find in doll sizes, but when you do, it looks positively gorgeous along the edges of a garment.

My Friday blog post will be announcing a new item in my store, and braided trim will be a part of the suggestions for items to decorate the edges of your doll clothes. I’ll be sure to link to online stores and websites where doll-sized braided trims can be found, to make the hunt for this lovely type of trim a whole lot easier for all of you.
Just look at how the edge of my Barbie’s dress POPS, with that gold braided trim running right along the edge and straps:

For her straps, I used burgundy ribbon, and just attached the braided trim right over the top of the ribbon. But it would have been possible to add the braided trim as straps without the ribbon, as well.

Braided trim comes in many colors, designs, and sizes. You can find it with rhinestones attached, glitter, and even a row of tiny sequins.

When we attach fringe to a garment, it’s usually woven into a braided trim as well.
Have a look at my Lammily doll’s poncho project (below), which uses a braided-edged yellow fringe to add a wonderful ethnic ambiance to her garment. The braided portion of the trim was sewn in-between the two layers of fabric that form the poncho.

And at the top of her poncho, there’s a braided trim that has red pom-poms attached to it, to add even more fun to this fanciful garment!
2. Coming in at number two is rickrack trim (AKA ric rac trim or rick rack trim). I love this stuff!
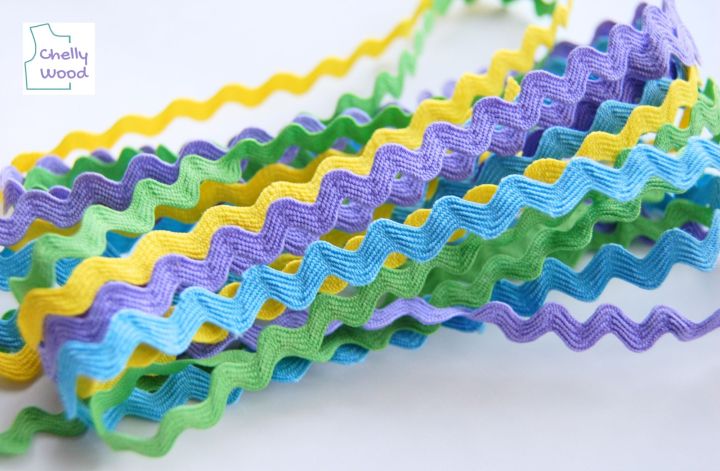
When you add rickrack trim to a garment, it gives the garment a nostalgic feel, like we’re traveling back in time to the days of my childhood in the early 1970’s. I just love that!
According to Wikipedia, rickrack trim was “Invented in the mid-19th century, [and] it took its modern form and current name around 1880. Rickrack’s popularity peaked in the 1970s and is associated with the Little House on the Prairie.”**

You can add rickrack to the underside of a hem, to give a scalloped edge to a garment, like you see on my “Sunflower Harvest Dress,” one of the most popular designs I’ve ever made (see image below), and one which always seems to get a lot of downloads at this time of year.

But you can also run rickrack along the edge of a pocket, or right atop the hem, like you see in my little blue and orange halter top swimsuit coverup, which is being modeled by an American Girl Wellie Wishers doll:

To learn more about rickrack trim, you can watch a video I made a few years back called “What is rickrack trim? And how do you use it?” Follow that link to find the video.
And now for number one… Can you guess what it will be?
1. Lace! What little girl doesn’t love a dress that’s trimmed in lace?

The examples above are what’s called “crocheted lace,” because it’s made using crochet methods.
You can find crocheted lace in a variety of colors, like the light green lace that my Lammily Photographer doll is wearing in the image below.

But lace trim also makes a lovely ruffle, whether you’re using a polyester lace, a crocheted lace, or even eyelet. Along the straps for the apron shown below, I used a pre-gathered eyelet lace trim to give the apron a really vintage Victorian feel.

Simply running a row of lace trim under the hem can turn an ordinary skirt into an extraordinary one!
Just look at how pretty Skipper looks in her red, lace-trimmed circle skirt below. The pink poodle skirt is certainly fun and feminine, but the lace is so dainty!

When it comes to doll clothes, lace trim can be used for wedding veils, straps, sleeve cuffs, necklines, and petticoats. The possibilities are endless…
And that does it for my article on five types of trims to use when sewing doll clothes. Did I leave anything out? Feel free to add more types of trims in the comments, so other people can benefit from your suggestions too.

If you enjoyed this blog post, and you’d like to see my videos, you might want to navigate over to my YouTube channel, ChellyWood1 to look through my playlists.
If you would like to make a donation to this free doll clothes pattern website, please click here. There’s also a “Donate” button in the main menu.
For anyone who would like to expand their dolls’ wardrobes, you should really check out my “How to Alter Doll Clothes Patterns” course and my “Design Your Own Doll Pants Patterns from Scratch” classes on the Creative Spark online learning platform. Here’s my bio page on their website, where you can learn more.

For any class on Creative Spark, you don’t have to follow a schedule. Just sign up when you’re ready.
It’s a one-time fee for the course, and there’s no specific time limit to finish your course. You can just take your time and learn at the pace that suits you. So go check out my paid courses on Creative Spark, using this link.
As always, feel free to pin, like, or tweet about my free patterns and tutorials.
To read more about my free sewing patterns and tutorials, please visit the “Helpful Tips” page.
Disclaimer/Credit/Affiliate Marketing Link:
*Please note: when you click on links to various merchants on this site and make a purchase, this can result in this site earning a commission. Affiliate programs and affiliations include Amazon, JoAnn Fabric, Etsy, and the eBay Partner Network. As an Amazon affiliate, I earn from qualifying purchases. To learn more about how my website uses affiliate marketing, please visit the website’s Privacy Policy page.
Chelly Wood and the ChellyWood.com website are not affiliated with any of the doll or toy companies mentioned in this blog post, but Chelly enjoys designing her doll clothes to fit a variety of dolls. To learn more about the doll companies mentioned in today’s post, please visit the doll or toy company’s website.
**Wikipedia contributors. “Rickrack.” Wikipedia, The Free Encyclopedia. Wikipedia, The Free Encyclopedia, 8 Jan. 2023. Web. 2 Sep. 2023.