Here’s the tutorial video showing you how to make the doll dress I previewed Monday. The patterns for making this dress were posted on Tuesday, Wednesday, and Thursday this week, but just to make it super easy for you, here they are again:
- Pattern for Skirt A (print 2)
- Pattern for Skirt B (print 1)
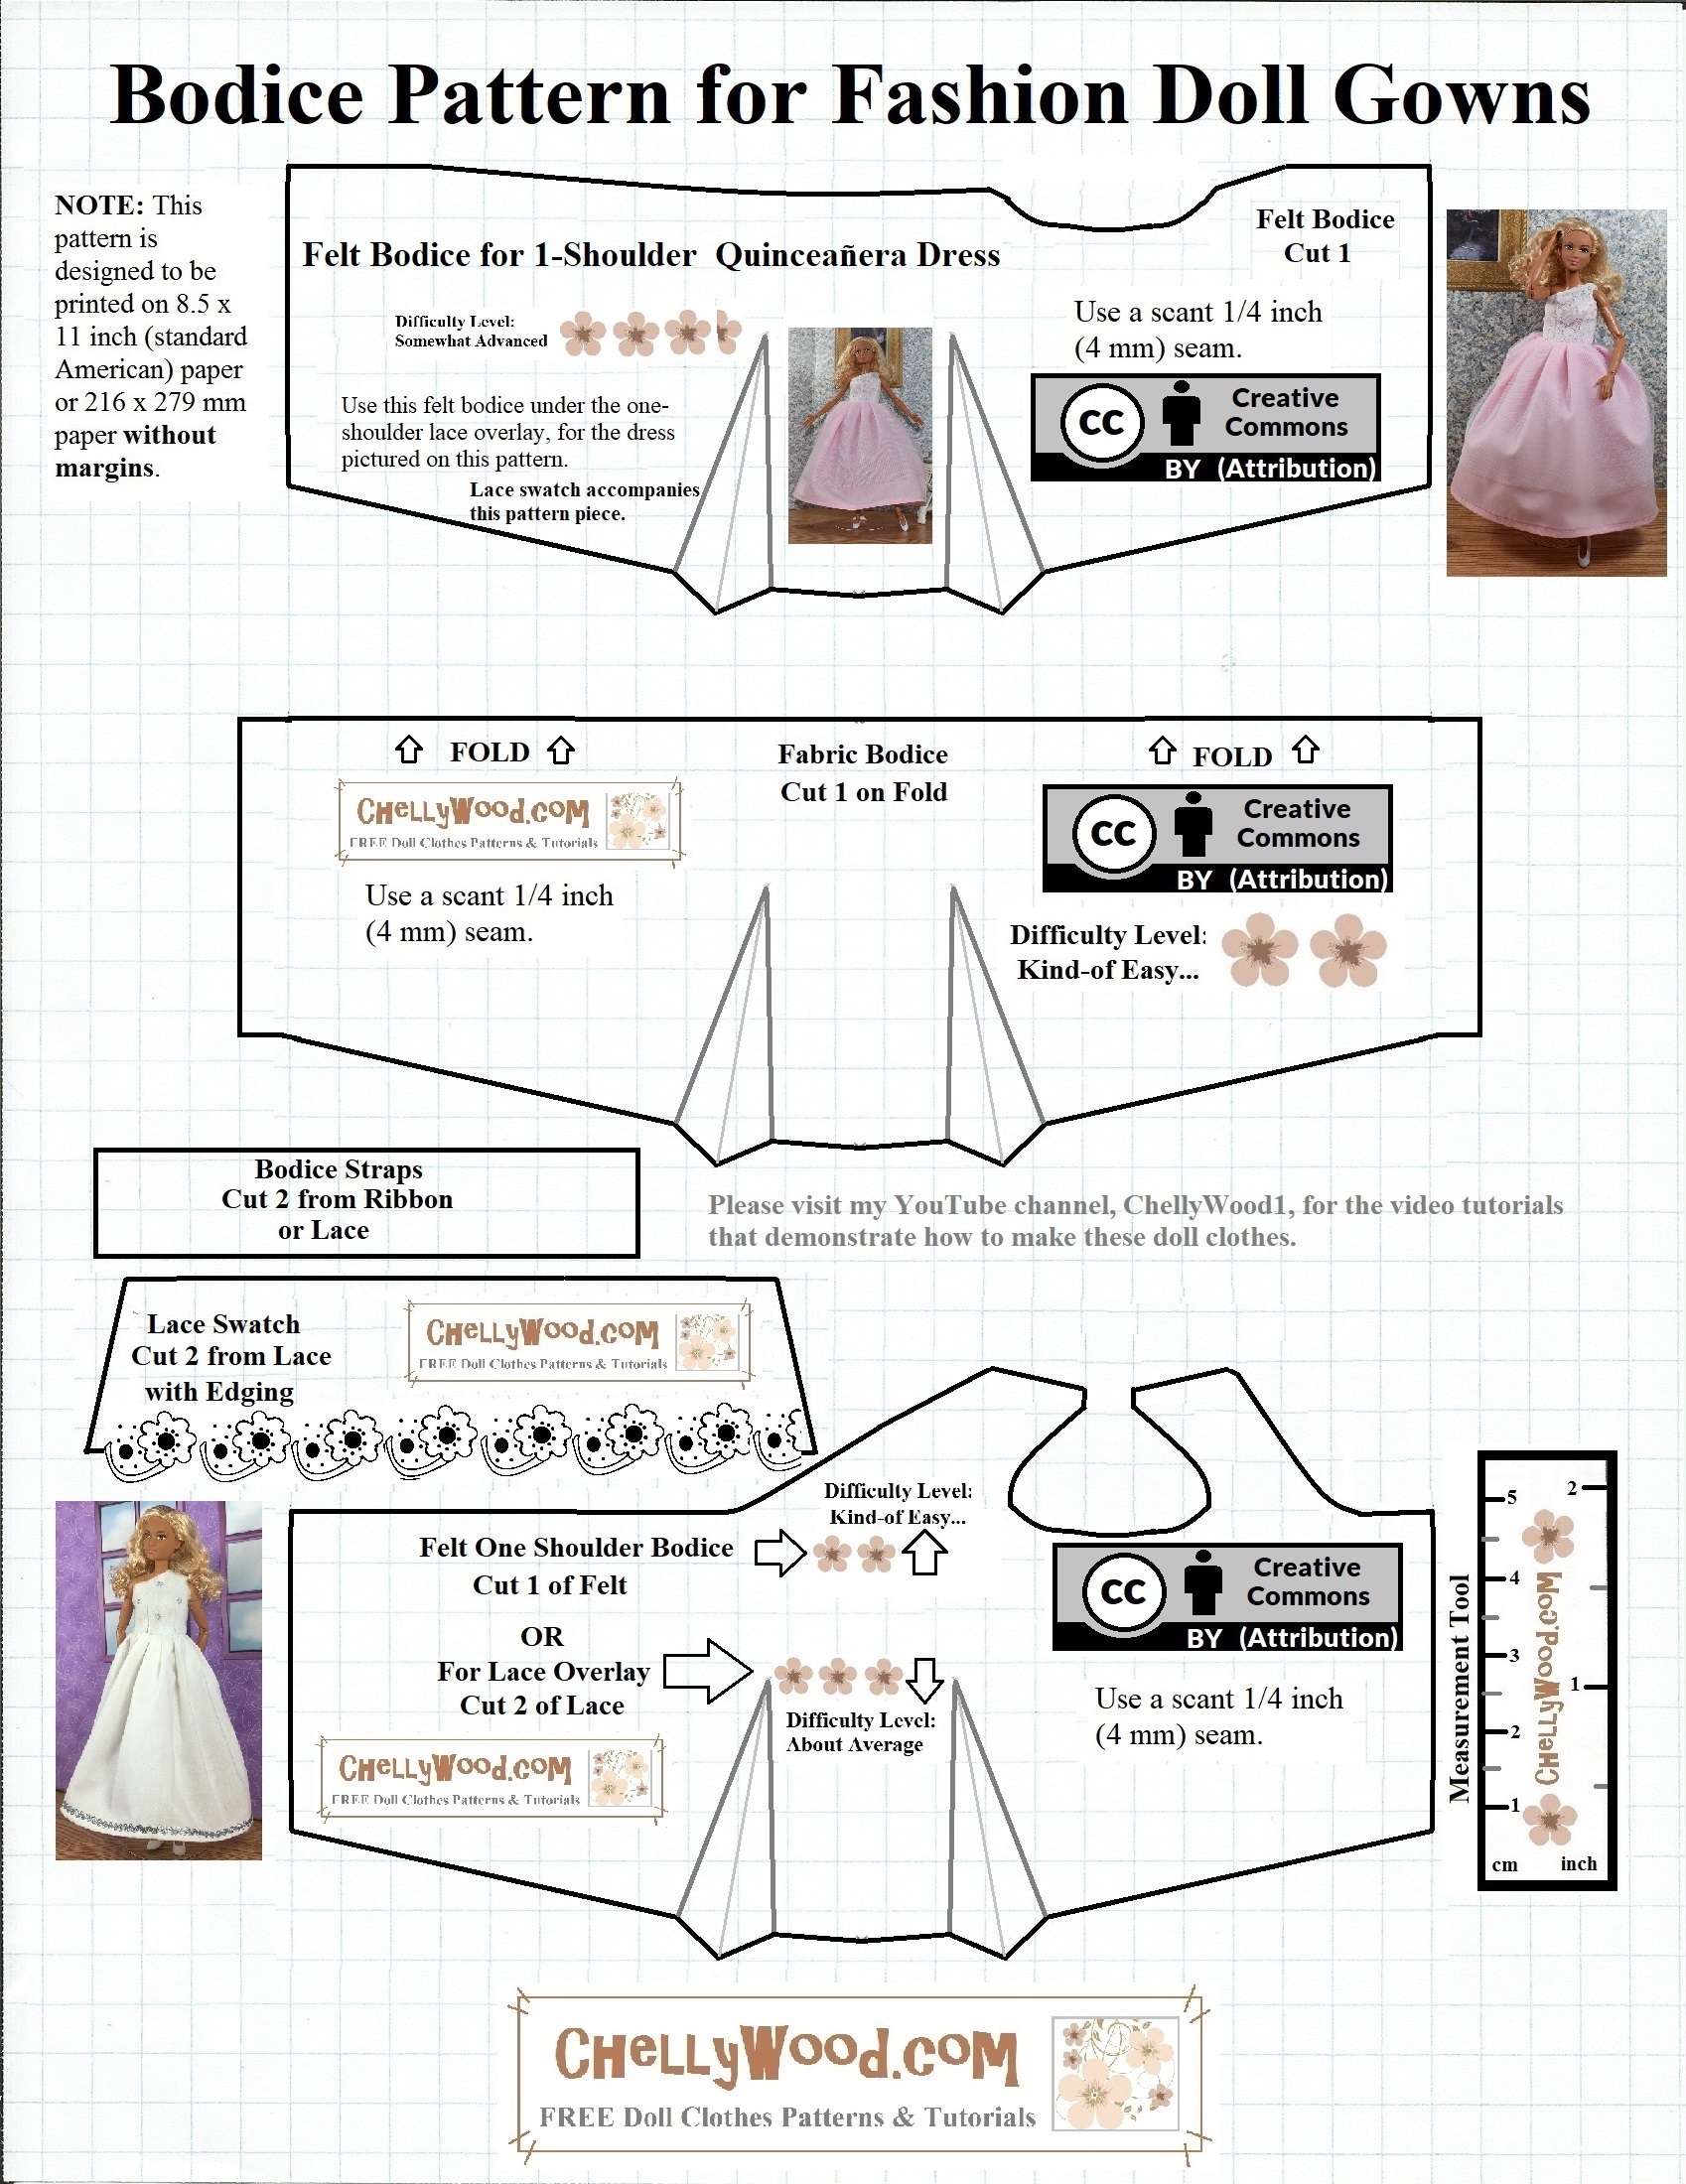
- Pattern for the Bodice
Skirt patterns A and B will be cut out and taped together to form a full skirt pattern. Please note that you will need to print two copies of Pattern A and one copy of Pattern B, to make the full skirt shown on the wedding dress in Monday’s post.
When you use this skirt pattern to cut out your skirt’s fabrics and lace, if you want to make the skirt super full, you should place the taped pattern’s A side (one of them anyway) on the fabric’s fold before cutting the skirt out. That will ensure that you get a really full skirt (but you may wish to use tulle instead of crinoline for the petticoat in that case, so it isn’t too thick in the gathers).
This skirt pattern will also show you how long you need to cut your swatch of lace. The lace is just for decoration, though, so it doesn’t have to go all the way to the hemline on this pattern. Mine went about 3/4 of the way down the pattern.
I recommend that you cut the petticoat a little shorter than the cotton skirt. After cutting out your cotton skirt, trim the taped skirt pattern at the top line of the cotton skirt’s hem marking (cutting along the line where it says “double-fold hemline). Then use the pattern again to cut out the petticoat. That should prevent you from showing the petticoat under the skirt.
Additional Information:
__________________
Recently, some of my followers have wondered what motivates me to give my patterns away for free.
First of all, I’m a librarian by trade. Librarians love free stuff! We believe that the more a person knows, the more enriched their life will be. So it may sound kind of crazy, but I want ChellyWood.com to become a sort of library of free patterns that help people learn to sew doll clothes.
If you’d like to learn more about my motives, feel free to visit my Chelly’s Books page.
My Gallery Page is the easiest way to search through all of my patterns to find what you want. Each image on the Gallery Page takes you to links for patterns and tutorials.
Need help printing my patterns? This link offers a tutorial showing you how to download and print my FREE patterns using Google Docs. (For the older print-a-pattern tutorial, which uses Microsoft Word, click here.) To review my difficulty scale (demonstrating how hard or easy a pattern is by the number of flowers displayed), take a look back at this blog post.
Please note: you must enlarge my patterns to fit a full-sized piece of American computer paper (8.5 x 11 inches or 216 x 279 mm) without margins, before printing. These designs use a scant 1/4 inch seam (4 mm to be exact).
My patterns are now available through “Creative Commons Attribution.” This means that I created my patterns (and therefore I own rights to them), but I’m willing to share them with everyone who will tell people about my website.
Here are some helpful ways to tell the world about my patterns:
- You can pin them on Pinterest.
- You can like them on Facebook.
- You can tweet about them.
- Use any other form of social media that appeals to you!
Are you new to sewing? I’ve got a playlist of tutorials for the beginning sewists on my YouTube channel. It includes video tutorials showing you how to do a basic straight stitch when sewing by hand, how to use the whipstitch to hem a garment, how to sew on snaps, and even how to design your own doll clothes patterns, for those who are new to design and alterations.
In case you haven’t heard, I have actually designed some commercial patterns for Lammily LLC. You might want to visit the Lammily website to see what they’ve got going on.
If your question wasn’t answered here, feel free to submit a question. I’m always happy to help my followers find what they need, so they, too, can make amazing doll clothes and crafts!